Article series
- Introduction
- Charles Proxy Setup & Configuration
- Charles Proxy in Action
- Fiddler Setup & Configuration
- Fiddler in Action
To get started, please follow the official instructions to install Charles on your preferred platform.
On Windows, Charles is automatically configuring your system and browser settings to route all traffic through it when you start the program. The same applies to macOS when you confirm the permission dialog.
On Linux, things are slightly different. You have two options:
- Setting your
http_proxyandhttps_proxyenvironment variables tolocalhost:8888. Many applications use the environment variables and, in general, will affect most of your network traffic. - Installing a browser add-on for easy toggling between proxy on/off just for browser traffic, e.g., Proxy SwitchyOmega add-on for Chrome.
SSL Decryption
If you are going to work with HTTPS, you also need to set up SSL decryption. Without it, all traffic would be encrypted directly between API and frontend – which is good! With SSL decryption enabled, Charles will establish two secure connections. One to the API and one to the frontend. This way, Charles can read messages from both sides. It is a classic man-in-the-middle.
Follow these steps to activate SSL decryption. Replace *.mockapi.io with your API, e.g., api.example.com.
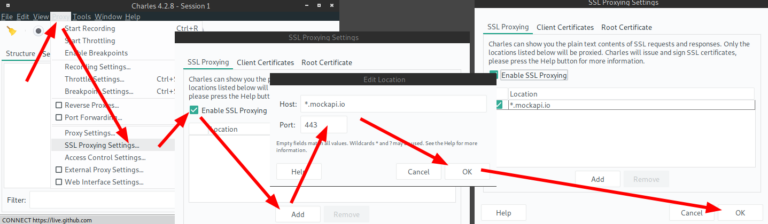
When you have already pointed your browser to Charles and are browsing to an SSL-decrypted page, you will notice a security warning about an invalid certificate authority.
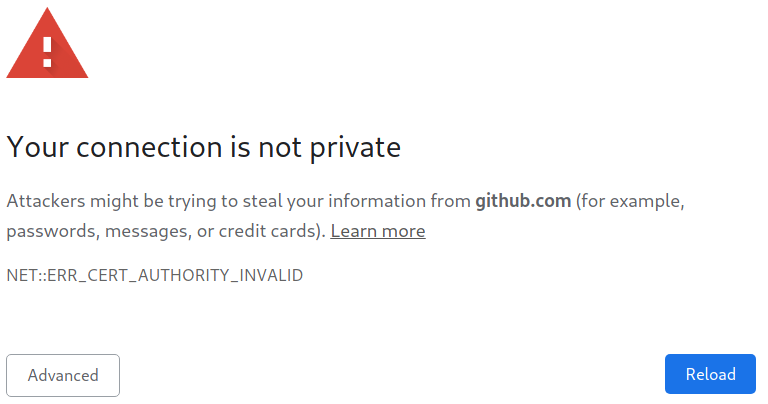
Your browser is mistrusting Charles’ certificate, which is a good thing (otherwise, SSL would be entirely worthless).
To fix this, you need to either trust each site’s certificate permanently or trust the Charles root certificate. Read more about the platform specifications here.
Recording Your Traffic
Assuming you have everything up and running, you can now start your first traffic recording session. Click on the “Start Recording” button and wait a couple of seconds.
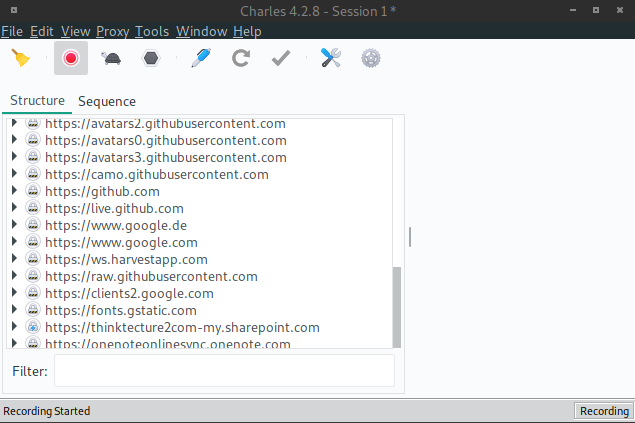
You will probably see a massive list of connections. Yes, browsers are very chatty, especially with many tabs opened.
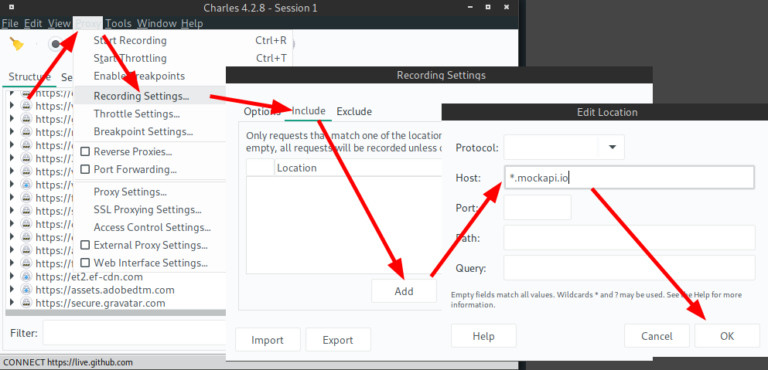
With default settings, we see every single connection from our browser. We can fix this quickly: In the menu, click “Proxy” → “Recording Settings” → “Include” and then add your API’s hostname. For this demonstration, we’re using the services of mockapi.io to create a simple REST API.
Deactivate Caching
It’s essential to take care of caching. In case your API sends caching headers, Charles will serve cached contents automatically, and you will not be able to inspect a response’s body. In the menu bar, click “Tools” → “No Caching”.
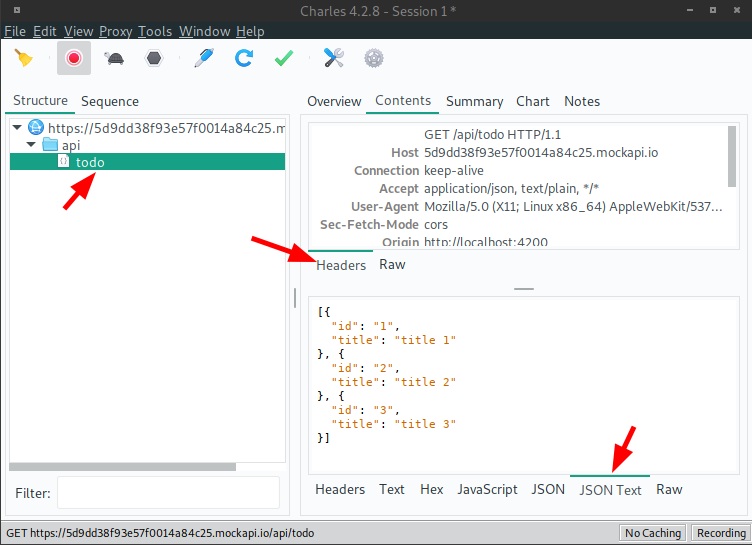
Our first record will now look like this:
Conclusion
In this short article, we have taken a look at how to install and set up Charles Proxy to record traffic and decrypt SSL traffic for testing and debugging purposes. Charles makes this process flawless, and we will use this as a base for the upcoming articles.
In the third article of this series, you will see Charles Proxy in action.