All examples and code references refer to Angular 14.2.2. Also, note that all explanations only apply to Angular versions based on Ivy.
At Thinktecture, we support our customers with various problems in our daily work. Of course, the topic of performance optimization is always on the agenda. Many developers from the Angular environment associate “performance optimization” directly with OnPush. Accordingly, OnPush is often used in many projects right from the start. But OnPush doesn’t automatically guarantee to skyrocket your application’s performance. If you lack knowledge of what it does under the hood, it can quickly turn into the opposite. It can lead to unexpected problems, which may only become apparent much later in the project and are not easy to detect. To help you avoid these pitfalls right from the start, we’ll first dive into Angular’s code to look at what OnPush does with the change detection mechanism and then head into some examples.
Before we dig into the internals of OnPush, you should make sure that you have a general understanding of what change detection is, why we need it and how Angular handles it. If you need a quick refresh or a basic introduction to the topic, I highly suggest looking at the article What’s the hype with OnPush, by my colleague Max Marschall first.
Component = View
As we all know, our components in Angular form a hierarchical tree structure. However, the change detection is not executed on the component but on a low-level abstraction layer called
View or, more precisely, LView (the term “view” is used interchangeably with the word “component” in the following). A view is directly associated with an instance of a component and contains additional state information, the LViewFlags. These flags are significant to decide whether a change detection cycle for the view and all its children will be skipped or not. The most important property here is CheckAlways. Note: As you might have noticed, the flags represent specific bits of a number. This mechanism performs well when storing multiple flags in a single value.
When no CheckAlways flag is present, Angular will skip the change detection checks of the view and all its children. And this is where ChangeDetectionStrategy comes into play.
Angular's two change detection strategies
The default of
CheckAlways corresponds to Angular’s ChangeDetectionStrategy.Default. Here, Angular starts at the top view and recursively applies the check and update process for all child views, the tree downwards.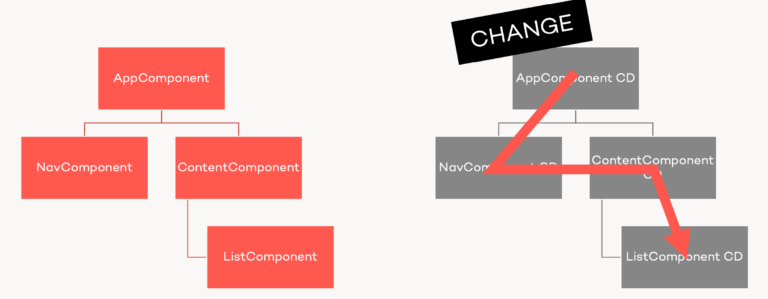
So
ChangedetectionStrategy.OnPush must therefore unset the CheckAlways flag, right? It is not quite that simple. According to the comments in the Angular code, the following happens:Use the `CheckOnce` strategy, meaning that automatic change detection is deactivated until reactivated by setting the strategy to `Default` (`CheckAlways`).
Change detection can still be explicitly invoked. This strategy applies to all child directives and cannot be overridden. (Angular code here)
We can confirm that quote by looking inside Angular’s
ComponentFactory class (Angular code here). With OnPush, the view is marked as Dirty for checking it once; otherwise, CheckAlways is the default.
					const rootFlags = this.componentDef.onPush
                  ? LViewFlags.Dirty | LViewFlags.IsRoot
                  : LViewFlags.CheckAlways | LViewFlags.IsRoot;
However, if the
@Input of the component changes, Angular will schedule checks again. The setInput function of the ComponentRef handles this. A function markDirtyIfOnPush gets called and sets the Dirty Flag on the view, so it gets checked.
					export function markDirtyIfOnPush(lView: LView, viewIndex: number): void {
  ngDevMode && assertLView(lView);
  const childComponentLView = getComponentLViewByIndex(viewIndex, lView);
  if (!(childComponentLView[FLAGS] & LViewFlags.CheckAlways)) {
    childComponentLView[FLAGS] |= LViewFlags.Dirty;
  }
}
At this point, we should look at the three scenarios when an OnPush component triggers a change detection:
- When an
@Inputchanges - When an
@Outputtriggers - When the
markForCheckfunction gets called
So what can we take away from this? We saw that OnPush is not a performance tool per se; it is just a different strategy for Angular’s change detection that can help to reduce unnecessary change detection cycles, which may result in better performance. Especially within larger applications with many components, but it isn’t a guaranteed performance booster for every application.
After all this dry theory, it is time for some practical examples.
Always do it the "Angular way"
During my daily work, I stumbled over a git repository, which implements a graphical data picker component. It is an excellent example of how OnPush can show you your mistakes. I created an Angular application with the mentioned data picker in the following example (I took the code from the repository and adapted it a bit to fit the current Angular version; please feel free to play around with it).
Using
ChangeDetectionStrategy.Default (which is the default), everything works smoothly. But the component seems broken when we set it to OnPush (like in the example below). Typically, the data wheel should rotate and lock when released. But what is the reason for this?When we look at the components code, we are even more confused. There are several event handlers reacting to mouse events. When we interact with the wheel and look at the console, we see that the events are registered and doing their work.
As a result of what we have learned, a change detection cycle should trigger. But why was it not?
The error is basically where the
EventHandler registration takes place. When we look at the code, we can see that the handlers directly get registered on the element with addEventListener. As a result, Angular doesn’t know that the events raise in this particular component. So, it cannot set the Dirty flag on the view and will skip the component (and its children) from change detection
					  addEventsForElement(el): void {
    const _ = this.touchOrMouse.isTouchable;
    const eventHandlerList = [
      { name: _ ? 'touchstart' : 'mousedown', handler: this.handleStart },
      { name: _ ? 'touchmove' : 'mousemove', handler: this.handleMove },
      { name: _ ? 'touchend' : 'mouseup', handler: this.handleEnd },
      {
        name: _ ? 'touchcancel' : 'mouseleave',
        handler: this.handleCancel,
      },
    ];

    eventHandlerList.forEach((item, index) => {
      el.removeEventListener(item.name, item.handler, false);
      el.addEventListener(item.name, item.handler.bind(this), false);
    });
  }
But how can we solve the problem? In this case, it is pretty simple. We need to register the events in the „Angular way“ instead. In this example, we should do this via template binding. Thus, the framework can map the event to the component and mark it to be checked, although using OnPush.
This small example shows us how important it is to solve our problems with the tools that Angular provides and how OnPush has shown us our mistakes that we possibly wouldn’t have discovered with the default strategy.
Mutable Objects and OnPush don't like each other
Let’s have a look at another example. A presentational component with OnPush change detection receives a person object as an input parameter. After the startup, the object displays correctly; so far, so good. Then we change a value in the form. But what do we see? Nothing happens. The child component doesn’t display the change correctly. But when we check the output in the console, everything should work correctly.
The simple reason is that OnPush-based components compare their input parameters via object comparison (
Object.is(), Angular code here). In the previous case, the object itself did not change; instead, the code mutated only an object member.
					mutatePerson() {
    this.person.name = this.form.value.name;
    this.person.lastName = this.form.value.lastName;
    this.person.age = this.form.value.age;
    console.log('Person mutated values: ', this.person);
}
The
@Input registers no change and doesn’t set the Dirty flag for the next cycle. Exactly such problem constellations can often lead to unintentionally sprawling debugging sessions. To avoid these from the outset, you should use an immutable state or immutable objects. Doing changes on immutable objects means that you don’t modify any properties but always create a new object with the changed values. It is also mandatory to treat your objects this way when using any store pattern or store-related library like ngrx.If you are also interested in this topic, check out the articles and webinars of my colleague Yannick Baron.
Last but not least, how do we fix our example? As mentioned before, we need to replace the person object with a new one. And everything works as expected.
					mutatePerson() {
    this.person = this.form.value;
    console.log('Person mutaded values: ', this.person);
}
Conclusion
Finally, let’s briefly summarize our learnings. We saw that OnPush is not a performance tool per se. It just changes the strategy of Angular handling the change detection cycles. When using OnPush, we need to take the responsibility of knowing when the view actually gets updated and possibly need to update it manually. As a result, it rewards us with reduced change detection cycles and, therefore, may increase the performance of our applications. But be aware that OnPush also mercilessly shows us our mistakes, which may result in some headaches. But after you read this article now, these headaches should be history by now. To avoid them even better, follow the most important rule of performance optimization:
Don’t worry about optimization if you are dealing with smaller applications or not encountering issues like stuttering or frame drops.
And if you’re interested in the best possible performance from the start, keep in mind what we’ve just learned.